Data Binding with Server Controls
With data binding, you can bind Ektron server controls to a GridView Control, DataList Control, or Repeater Control. This gives more flexibility when you use data from the Ektron server controls. Benefits of data binding include ease of data manipulation and the ability to format data.
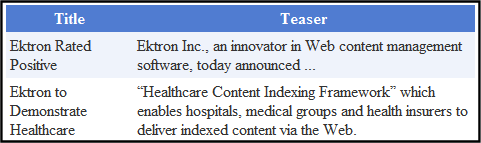
Warning! When HTML is bound to a column, you need to add HtmlEncode = False to it. Otherwise, the HTML appears as code. For example, <p>Ektron Inc., an innovator in Web content management software, today announced...</p>.
The following are data bindable Ektron Server Controls.
Collection
ContentList
IndexSearch
ListSummary
MetaDataList
RssAggregator
The following is an example of code behind that uses a GridView to display a Collection:
Note: For the example code below to work properly, you need to drag and drop a GridView server control on a Web form.
Dim myCol As New Ektron.Cms.Controls.Collection
MyCol.ID = “Collection1” ‘‘‘Create an ID for the Collection
myCol.DefaultCollectionID = 4
myCol.Page = Page
myCol.Fill()
GridView1.DataSource = myCol
GridView1.DataBind()
Steps to Data Binding Using Drag and Drop Server Controls
The following example uses a Collection.
1. Create a new Web form.
2. Drag and drop a data bindable Server Control on the Web form. For example, a Collection server control.

3. In properties, choose a DefaultCollectionID for the Server Control and make sure DisplayXslt is set to None- DataBind Only.

4. Drag and drop a GridView on the Web form.

5. In the GridView Tasks, choose the DataSourceID.

6. In code behind, add the following line of code to the Page add field.gifnit event:
Collection1.Fill()
7. Select the columns to be databound by clicking Add New Column in GridView Tasks.
8. Complete the Add Field window according to the table below.

|
Field |
Entry |
|
Choose a field type: |
BoundField |
|
Header text: |
The title name for each column. |
|
Data field: |
The data to bind to each column. Choose one of the following: ID - the content block ID Title - the content block title Teaser - the content summary Html - the html content StartDate - the content’s start date DateModified - the content’s last modified date EndDate - the content’s end date LastEditorFname - the last editor’s first name LastEditorLname - the last editor’s last name QuickLink - the content’s quicklink HyperLink - the content’s hyperlink DisplayStartDate - the string representation of the start date FolderID - the folder ID where the content is located ContentStatus - the content’s status Language - the content’s default language DisplayDateModified - string representation of the content’s last modified date DisplayEndDate - string representation of the content’s end date EndDateAction - an action tied to end date. For example, Refresh_Report Comment - the content’s comments |
9. Click OK.
10. Repeat steps six, seven and eight for each column you want to add.

11. If you want to add all of the columns automatically, in the GridView Task menu click Edit Columns. Otherwise, skip to step thirteen.

12. Click the Auto-generate fields checkbox.

13. Click OK.
14. From the Build menu, click Build Page.
15. In design view, right click the form and select View in Browser.
For more information on GridView, DataList, Repeater and DetailsView, see the help inside Visual Studio.